Showing posts with label cookies. Show all posts

Sunday, August 28, 2011

Oreo and Chocolate Chip Cookie Brownies


I came across this idea somewhere on the web but never got a chance to try it out until now. It's simply a very sweet and fudgey, brownie with a chocolate chip cookie base and oreo cookies in the center. I must say that this must be the sweetest dessert that i have every made, so sweet that I decided to cut it into small morsels, something like fudge cubes. I made these morsels for a farewell, campfire party for my best-est friend, who is moving to another province. I'm glad she and her guests enoughed this insanely sweet treat.


Thursday, June 23, 2011

124 Decorated Chai Elephants


One elephant, two elephant, three elephant...
A co-worker of mine placed an order for 124 elephant cookies, made with my shortbread cookie base, flavoured with Masala Chai spice (cinnamon, cardamom, ginger, cloves and black pepper). The cookies were outlined and covered with melted white chocolate, similar to the process of flow icing. I opted for the chocolate because it is less sweet than flow icing and it goes smoothly with the shortbread. The red accents are drawn on with red candy melts s and accented with edible red shimmer. Gold touches are painted on with edible gold paint and golden sugar balls. Ears, toes and darker detailing are drawn on using melted cinnamon chips. The entire order took me around 24+ hours to complete. 100 cookies acted as party favors at a 25th wedding anniversary, 1 dozen were used as a gift with a complimentary best wishes heart to couple and 1 dozen were for personal enjoyment.
I'll be dreaming of elephants for the next little while lol.


Woooo! Elephants all around!
Me, packaging lol
Individually Packaged
The dozen being gifted with heart piece.
My mom's wonderful job, cause I suck at ruffle wrapping


Wednesday, April 20, 2011

Cranberry and Yogurt Chip Oatmeal Cookies


Tried something new today. Dried cranberries, pure yogurt chips, and quick oats. Yummeh!!


Thursday, March 17, 2011

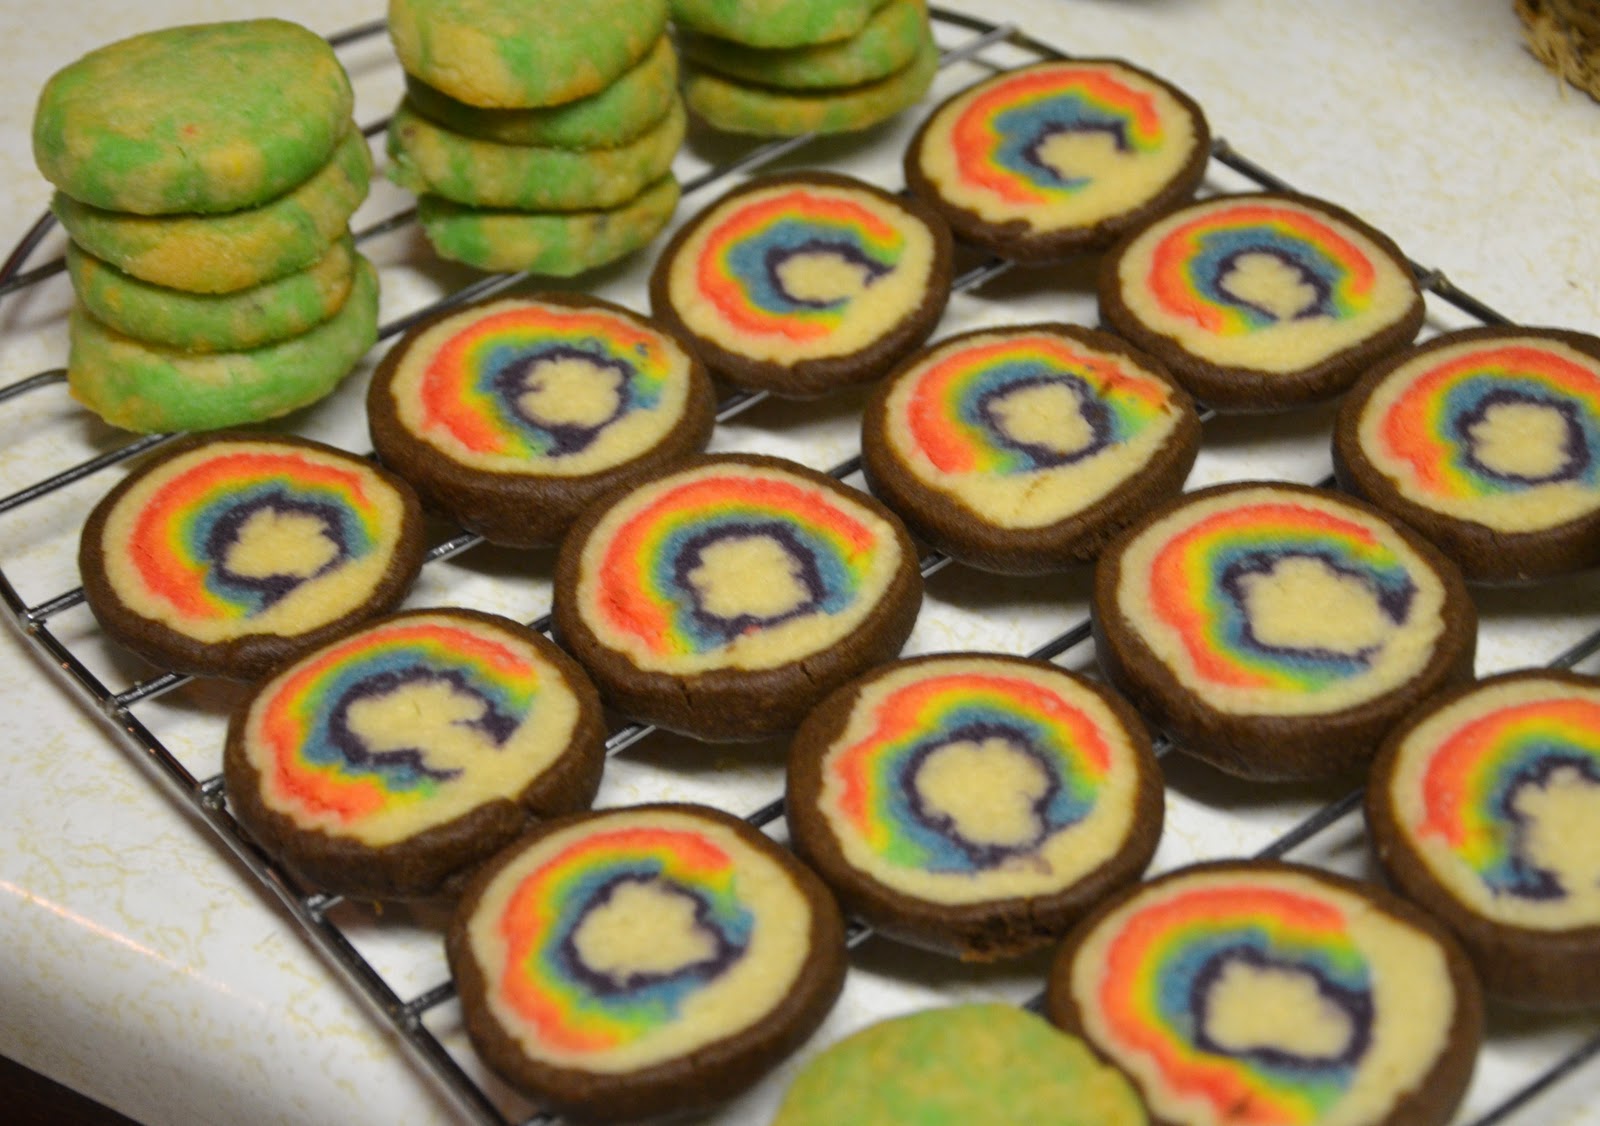
Happy Saint Patrick's Day!

St. Patrick's Day is probably on of my least favorite holidays partly because the theme color is green (not my fav color) and that I just don't get it. I know there's a religious aspect to it but I'm not religious. Plus I find leprechauns creepy...
ANYWAYS, I still need to perfect these. Rainbow was okay until the purple closed at the bottom and a ripple effect appeared because I was too rough when rolling the dough up....and the green in the marble cookies need to be a bit darker. And the shamrock...I need to pay more attention to what I'm doing lol.
I like the rainbow ones the most though...go figure lol


Tuesday, March 8, 2011

Wonder Woman Cookies


Happy International Women's Day! Today is a day to celebrate all the achievements (big or small) made by all the women from every nook and cranny of the universe. And what a better tribute than cookies...of WONDER WOMAN?!? I felt like Wonder Woman this morning when I had to help my mom push her van out of a snow pile that she backed up into. I was the only one home at the time and she was driving out of the driveway to work. I have no idea how she ended up in the snow pile on the sides of our driveway. But I felt so awesome pushing the van out by myself while she was in the drivers seat. Hurrah for me haha!
So, I've had a piece of shortbread dough in my fridge for a week now and I was dying to make something and get creative. I used the cut-out method- individually cutting out the cookie shapes and attaching other parts to it (hair, colored areas, etc.). I then drew on her features and details with colored icing, although I'm not great at drawing faces. There were a few cookies that looked like men, but oh well lol. Total labor time was maybe around 4 hours minimum.

My Reference

First cut-outs with ref. pic as tracer

Addition of hair cut outs
Completed cookies before baking and detailing

BAKED!!
One of the cookies that actually looked good lol

Saturday, February 26, 2011

Pixel Cookies: Link from Zelda


I like to challenge myself. And when I do, I challenge myself to the extreme. I have come across "pixel" cookies a long time ago but I never got around to actually trying it out. "Pixel" cookies are basically shortbread cookie dough, cut/pressed into strips and are painstakingly put together into a log or rectangle which is then sliced into cookies to form an image of a pix-elated picture. I finally got my patience and confidence up after watching a video my brother showed me. So after trying to find an image or character, with intense research (by intense I mean sitting in my bed and typing in "pixel cookies" or "pixel characters" on Google lol), I came across a Link pixel cookie. I have always enjoyed making Zelda themed items (birthday cards, crafts and the such), so I made a decision on Link. But I wanted it to be different and I guess, unique (as can be), thus I came across a pixel Link painting on deviantArt and decided to use that as my reference.
Something you should know about me, is that I HATE math. I am absolutely HORRIBLE at it. Thus, I have never done so much "math" in my life, especially with a cookie. I needed to know how many "pixels" were in the image, plus figure out how many colors I needed and how much of each color; and what size I wanted the entire cookie to be was important also. It seemed like forever but I managed to somewhat figure it all out.
The cookie probably took me 12+ hours all together to assemble, minus baking time and chilling time (30 mins). The cookies were around 3 inches x 3.5 inches and are FLAVORED! Pandan (green) and coco-vanilla (white) flavored. Why? Cause I'm a cool Asian.
The recipe for the shortbread is somewhat "my" recipe. For a simpler and still delish recipe, the recipe that my friend and I used for our shark cookies is awesome too.

If you don't have the time or the patience to make these, you can purchase a made-to-order dozen here at my cookie shop.
(If you mention that you came across my blog, I'll give you a bakers' dozen.)

Buttery Shortbread Cookies

For 3 dozen:

2 cups flour
1 cup Corn Starch
1 cup icing sugar
1 1/2 cup butter, softened
2 tsp vanilla

1. In a large bowl, combine flour, corn starch and icing sugar. Blend in softened butter with a wooden spoon then knead with hands until a soft, smooth dough forms. Divide dough into desired portions and work in desired colors.
2.Do whatever your heart desires.
3. Preheat oven to 350 degrees Fahrenheit (180 degrees Celsius). Bake for 10-12 minutes or until edges are just starting to turn brown. Cool 10 mins on sheets then remove onto a rack and cool completely.

The log-rectangle thing!...before cutting

Ready to bake!!
BAKED!!

Wednesday, February 23, 2011

Shark-tastic Shortbread Cookies!


So, today, after a small adventure downtown, my best friend and I went back to her place to make some cookies. And not just any kind of cookies. Shortbread cookies. No, not the regular plain and beige melt-in-your-mouth delectable. We made shark cookies. Peppermint and vanilla, shark cookies. Why? Because sharks are cool and we are just cool like that. You should be jealous.
She used the Scotch Shortbread from The Joy of Cooking cookbook as a base and tweaked it a bit (coloring, flavoring, vegan butter/chocolate) to make these awesome cookies. The eye of the shark is a chocolate chip and she drew on the gills and mouth with homemade black icing. This whole procedure is thought out by my ingenious friend. She is an artist fo sho!

Shortbread Recipe

Cream:
(Fig. 1.0) Angry Shark is angry 'cause we broke him...
1 cup butter, softened

Sift together:
2 cups all-purpose flour
1/2 cup confectioners' sugar/icing sugar
1/4 tsp salt

Blend dry ingredients together with the creamed butter. Add flavorings or coloring, lightly knead until blended and shape as desired. Use you imagination!!
Bake in a 325 degrees F preheated oven for 20 minutes.
Let cookies cool a bit before transferring to a rack to cool completely or else cookie will break...(Fig. 1.0)


Black Icing
2 tbsp conefctioners' sugar
2 drops of each primary food coloring

Place all ingredients in a small sandwich bag, knot the bag and mix. Cut a corner off of the bag when ready to pipe/draw.


Wednesday, December 15, 2010

Chocolate-Candy Cane Cookies


Hello!! It's the holiday season!! And I felt like baking something. Recipe is from my Kraft magazine but I added a little adjustment of my own; peppermint extract. Also, instead of crushed peppermint, I used crushed minty melts for an extra treat.


1 pkg. (8 oz.) PHILADELPHIA Cream Cheese, softened
3/4 cup  butter, softened
1 cup sugar
2 tsp.  vanilla 
2 tsp. peppermint extract
2-1/2 cups flour
1/2 tsp.  baking soda
4 squares BAKER'S Semi-Sweet Chocolate, melted
1 pkg.  (6 squares) BAKER'S White Chocolate
12 minty peppermint candies, crushed 
 
HEAT oven to 350ºF.
BEAT first 5 ingredients in large bowl with mixer until blended. Add flour and baking soda; mix well. Blend in melted chocolate. (Dough will be stiff.)
ROLL tablespoonfuls of dough into 52 balls; roll each into 3-inch-long rope. Place, 2 inches apart, on baking sheets, bending top of each slightly to resemble candy cane.
BAKE 10 to 12 min. or until puffed and set; cool 5 min. on baking sheets. Remove to wire racks; cool completely. Melt white chocolate; drizzle over cookies. Sprinkle with crushed candy. Let stand until chocolate is firm.